Sunday, December 30, 2012

Dresser Remake

Here's the project I wanted to post a while ago. I would have more *new* content today if I hadn't dropped our huge bathroom mirror and cracked it when we were getting ready to install...

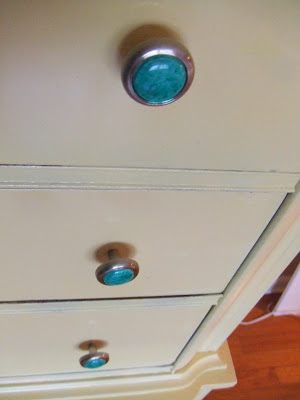
Anyway, here's the finished dresser from the summer. I finally got around to making the knobs. I used a cool technique I saw on pinterest--with the sharpie and the baking, etc... The knobs are what held me up on this post. I made some horribly ugly ones first that only served to collect immense amounts of dust.

Before:


After:


While I would've like to preserve the wood color of the dresser (which would have looked fantastic with the turquoise, by the way) the veneer was thin and too badly scratched for repair. I either would have had to purchase and apply new veneer, which is not a project I'm ready for, or settle for paint. Thankfully I think the painting turned out nicely.

Sunday, November 25, 2012

Picture Space

Hey readers. I'm working on a picture problem right now. Apparently I've used up 1 GB worth of picture google space. I'm working out what I want to do. I doubt it will involve paying for more space... I have an update to make, so hopefully I'll get it fixed soon!

Saturday, September 1, 2012

Hey Mister Postman

Curb appeal is important, right?  I feel like my house looks like a ski chalet from the outside, since it's brown and has those off-red shutters.

You may remember my giant mailbox from an earlier post... I'll refresh your memory if not. It has a big brick base and a rusting mailbox with no door on top. The mailbox is encased in concrete. Nothing says classy like a mailbox without a front.

I set out to rectify that at the beginning of August. By rectify I mean I took the outer layer of concrete and peeled it off with my fingers when I went to get the mail. That made it look even worse because you could see all the mold that had collected in the cracks. Jeremy really loves when I start these projects with no direction.

I have been working on this for a week or so now. Step one was to remove the concrete and the rusting mailbox.


Husband did a great job because the sledge is too heavy for me to use effectively.


Action shot!

We decided to leave the base intact because it looks fine and is sturdier than a post. Also cheaper than buying a post and concrete....

We had a rain delay and couldn't finish the mailbox install over the weekend, so we put a pink dropcloth down (not pictured) and the old mailbox. We definitely were the coolest house on the block Monday during the workday...


After screwing the wood to the bottom of the new mailbox I stuck it to the brick with construction adhesive. Once the mailbox was installed I got to work on making it excellent.

I bought some cedar boards at Lowes. I picked cedar because it's naturally rot and insect resistant. It's the only type of wood that you don't have to stain/seal (excepted treated wood, of course). I measured the distance on both sides of the mailbox and came up with plans for flower boxes.


The long boards are 23.5 inches and the short are 5.5 inches.


I used wood screws to hold the boards in place. As you can see they're not 100% perfect, but they're fine as far as I'm concerned. The circular saw makes it difficult to make really straight cuts, so everything gets a bit off...


If I did this again I'd screw from the inside to hide the screwheads. I'll just say I'm going for a rustic look...

Then I drilled some holes in the bottom for drainage purposes and picked up some flowers.
*Sidenote: I picked mostly red flowers because they're less likely to attract bees. I don't want the poor mail lady to get stung. I also planted them towards the back of the box to for the same reason and to keep access to the flag. These flowers should last to the late fall, hopefully.

Once the plants were potted I adhered some shelf brackets behind the mailbox to secure the boxes to. The boxes will be screwed to the brackets, but not permanently attached. Then I can remove them for replanting/repairs if need be.

Here's the finished product!


Tuesday, August 21, 2012

Little Craft Projects

I've had some little craft projects here and there.

Frame Fix.

I have this adorable picture of my whole family from when I was little. When my parents moved they had an extra framed copy so I got it. The frame is pretty nice and so is the mat. I wanted to put it on my frame wall, but that means it has to have a black element to fit in nicely. However, because the mat has a gold accent I had to keep some of the gold on the frame.

I took the part I didn't want painted, taped it, and sprayed the rest black with a gloss coat. I was pleased with how it came out... except the stupid tape pulled off some of the shiny silver leaf. I did a little bit of patching with metallic acrylic paint, but admittedly did not put a whole-hearted/walleted effort into it.


Baby Card

Then I did a little hand-lettered card for my friend Ashlee's new little man.

Card:


Little Man:


Adorable!

Bulletin Board

I am back at school now so I am in the midst of setting up my room. I made some fancy accessories for my bulletin board.

Took some regular clipboards...


Painted some modge podge on the clipboards and quickly stuck on some pretty scrapbook paper.


What fancy office supplies! Just as pretty and so much cheaper than the ones at Target. $1.75 each vs. $4!

Details in Home Improvement

I haven't been posting much on the blog lately because a lot of my projects have been functional, boring projects.

For instance, cutting the bottom 1/4 inch off of my closet door so it opens and closes smoothly. A very successful use of the circular saw, unassisted, by me :+). (Aside: We got a new circular saw--not sure if I mentioned this in an earlier post. We DESPARATELY needed one. The one we were using had a broken guide and the cord was cut, folded, and taped back together. The broken guide made it too heavy for me to move effectively and I would cut everything on an 80 degree angle. Intensely sketchy and dangerous)


Or painting the rusty heating covers for the master bedroom. They've been laying in the garage since May... 


I don't have pictures of them in the room because they're of random lengths. Jeremy needs to show me how they get put back together b/c I'm not sure which goes with which.

I've been working on this necessary project for a while too. The area underneath the door sill was rotting. The initial scraping out of the wood was gross. I wore gloves. Lots of gloves.


Eww slugs!


I cleaned out the space and put several coats of wood hardener to preserve it. Eventually I want to replace the white clapboard siding and legitimately repair the damage underneath, but that is probably far off because that has to be a Jeremy-endorsed and committed project.... which means it has to be totally necessary :-p.


I struggled but finally got the board into the open space an and then screwed it in. I'm probably going to caulk it in and make the seal nice and tight!


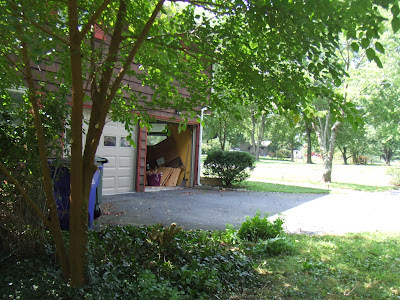
I also FINALLY trimmed this bush by the driveway.


Jeremy also cut down the dead boxwood on the edge. It certainly opens up the backyard.


Lots of random home improvement...

Tuesday, August 14, 2012

Trashing the Garbage Disposal

I've been holding out on you. I have a lot of projects in the works that just need the finishing touches on them. However, yesterday we discovered a project that needed our immediate attention. Our dishwasher seemed not to be draining. After a bit of vinegar/baking soda and septic-safe drain cleaner we still had a stagnant little puddle. Running some water in the sink revealed that our garbage disposal (which has never worked) was irreparably clogged.

We purchased the materials to install piping almost a year ago, but the task seemed daunting. Luckily, we were prettttty incorrect (hopefully). We had a garbage disposal in the apartment and never used it. This one has been broken practically since the day we moved in. We had no interest in installing a new and expensive unit, hence the piping.

I played the support role in this endeavor. Jeremy did most of the heavy twisting. The worst part was wrestling the disposal from under the sink. The connectors had all rusted and it required a good deal of force. Once we detached it from the sink we turned off all the power in the house and cut the cord. Because it was hard-wired Jeremy had to disconnect the disposal from its junction box in the basement. Don't worry, we took all necessary safety precautions and Jeremy made sure all now-unused wires were properly capped and un-electrified.

Here's the disgusting disconnected disposal:


I did not photograph the clogged part because it really grosses me out.

Here is what became of under our sink. It was a team effort. I was responsible for the plumber's putty around the drain rim. Jeremy did all the PVC (okay... he did a lot more, but I ran for supplies, lights, and fans when it got warm.)


Here is the remarkable thing: This successful drain system was installed in 2 hours and perfect on the first go round. From removing the disposal to running the water in the sink, we did it all without a single trip to Lowe's, curse word, or leak. Amazing.

Wednesday, August 1, 2012

USA! USA! USA!

In the spirit of the Olympics, I took on a very patriotic project. To be more honest, I've wanted to do this project for a while, but needed a printer. We finally broke down and bought one. At least we got an excellent deal on it! Other than that, I had all the materials.

 I used a blank piece of canvas that I'd gotten on sale a while ago. I started by painting it white.
*But Laura, isn't the canvas already white? Why yes, yes it is... if you don't attempt to freehand draw a map of the United States on it first.*

Learning from my previous attempt, I found a blank map of the US online, flipped it, and printed it BACKWARDS on four pieces of paper, so it'd fit perfectly on the canvas.


I then took tracing paper and outlined the states. After doing that I put the tracing paper face down on the canvas and colored over the lines to transfer the graphite. Ultimately I made some adjustments to Alaska's size. The original map I printed made it a bit too puny to look balanced, so I printed out a separate Alaskan map to trace.


 I also made a plan for the lettering. Extra points if you can see my ridiculous mistake. I labeled all the states without referencing a map, but apparently got so focused that the compass got away from me.


I then painted all of the states. I used 25 colors, so each is used twice. Here's my dining room workstation:


Once all the states were painted I took a white paint pen and filled in all the names.


After a couple coats of paint and letters, Voila!